Video Project:
|
Project Description:
The purpose of this project was to be able to go more in depth in video production skills. We were expected to create an outline, a storyboard, and a video that could be productively refined as the process was being played out. A big part of this project was refinement, and being able to look at the bigger overall picture. We had to incorporate many different camera angles and different types of lighting and settings, in order to create a documentary on a prompt of our choosing. Overall this project was very beneficial, and I grew as a learner, videographer, and person throughout it. |
|
Project Reflection:
Why to artists produce preliminary plans? (sketches, brainstorms, storyboards)
Artists produce preliminary plans to keep their ideas on paper, and to brainstorm different scenes and options they could use. Preliminary plans help artists by keeping them on track, as well as helping them remember their original ideas. Brainstorming can help artists refine their work and present their ideas without having to make the final product until they are ready. Using preliminary plans has helped me remember all of my ideas and sudden sparks of inspiration. It keeps me on track when I come back to my work the next day, and it was very helpful for this project so we could remember each idea for each new scene.
What problem-solving skills are employed in making works of art?
Many problem-solving skills are employed with making works of art, such as interpreting critique and figuring out how to refine one's work to make it better. Art can be very stressful, however, in the end all the hard work pays off. Figuring out how to overcome problems in art is very beneficial because it helps one when they run into other problems in the future. Art is not always easy to create, and it is not always easy to refine. Overcoming problems in art is one of the hardest things one can do, however, once one is able to overcome their problems, their art become very meaningful and beneficial to their life.
How is art used in everyday life?
Art is everywhere. Art is used in our everyday life through graffiti, fashion, furniture, paintings, and any sort of design. People express themselves through art by using colors, and designs to express their moods and emotions. Art is a valuable part of this world because it lets people express themselves in a positive and unique way. No piece of artwork can be the same, which is why art is so special. Through this project we used art in setting up out scenes, figuring out the lighting, and expressing our thoughts through video production. Each of our videos are unique and different, and we were all able to express ourselves through our videos that we created.
How can an artist create works of art through combining, expanding, and sequencing?
An artist can create works of art through combining, expanding, and sequencing by creating stop motion, slow motion, or any type of series of pictures, that when added together create a video type motion. Artists can use stop motions for creating a new type of feeling, or to express themselves in a fun and exciting way. Stop motions are used in movies and videos all the time, and they can be very beneficial for creating titles, or writing any text needed for the video.
How and why is art used as a vehicle for communication?
Art can be used as a vehicle for communication by letting the artist express how they feel towards something. Art can help towards communication by showing how the artist sees the world in a creative and unique way, that is also healthy and professional. It is a great way to inspire an audience, and a fabulous way to help the artist let out their feelings. I love expressing my views through art, and I felt as if we did this very well through our video project. We were able to create a fun, inspirational video that inspired the community to continue to do things for happiness, which is one of the most important things to have!
Political Cartoon Project:
|
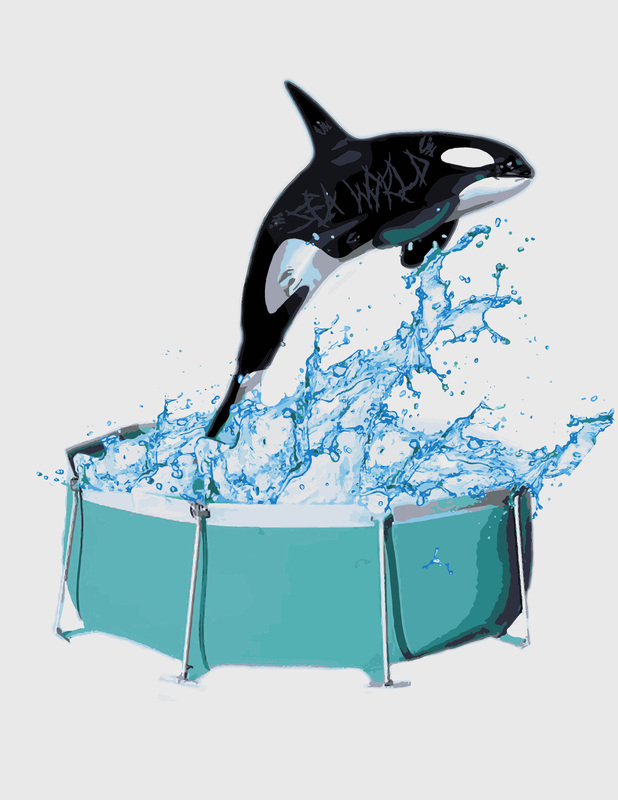
In this project, we watched the documentary (to the left) called Blackfish. After watching this documentary, we all created political cartoons to represent the terrible actions that sea world is making. This documentary touched many students, and this project motivated us to create projects that show how we really feel. Overall, this project was fun and very interesting to learn about.
|
|
Project Reflection:To the left is the political cartoon that I created. I wanted it to represent how Sea World treats the animals very badly, as well as show people that killer whales should not be kept in such a small space. These killer whales are being held in a small pool, and at night are placed in a small metal tank. They use their teeth to attack each other, and sometimes attack the trainers they are working with. I carved "Sea World" into the whale, to represent what this place can do to these hopeless whales. They are tortured, and the life span of a whale held in captivity is drastically shorter than a whale able to roam free. Information like this can be shared artistically, by making the viewer feel emotion and sorrow towards the subject. Creating a political cartoon gives the viewer a visual, and lets them see what is actually happening. When one creates a piece of art, they are able to express themselves in a way that they usually wouldn't be able to. It is a way to get out feelings, emotions, and a way to bring out your creativity. When one views art, it may not be as impactful, because they might not fully understand it. Not only that, but they may not relate to the piece of art work. Each individual should be able to express themselves, and I feel as if art is a great way to do that. Being able to make these political cartoons made me think in a different way, and gave me a perspective about Sea World that I never noticed before.
|
|
Pre Historic Art History Drawings:

Project Reflection:
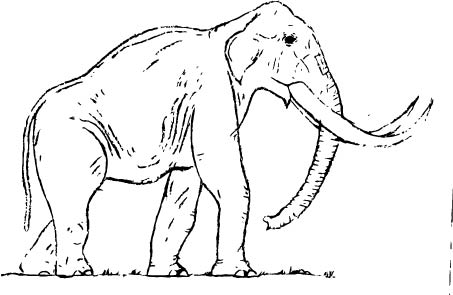
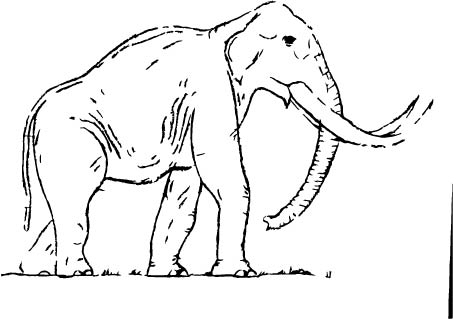
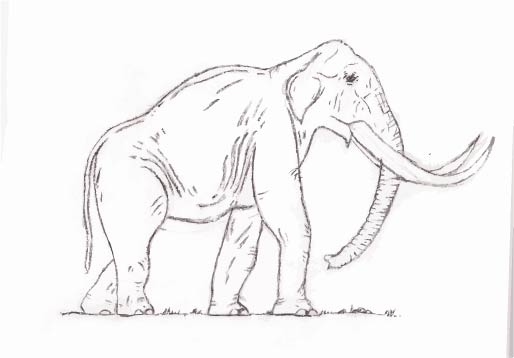
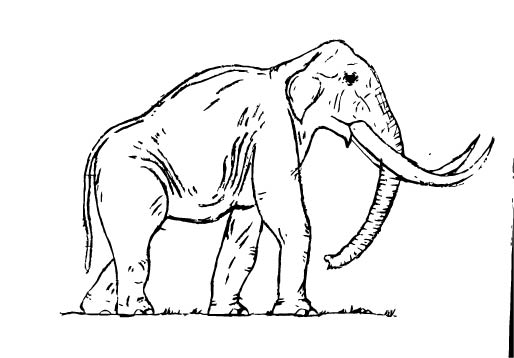
We started this project by learning about prehistoric ways of life. We took notes on the history of art, such as the Man Created Dog and the Paleolithic time period. The context around this project was to learn about the history behind each art piece, in order to understand what the artist was trying to portray. Learning about the history behind each art piece, gives the you background and knowledge, and lets you fully understand what the artist was trying to convey during that certain time period. After taking notes, we then were able to create drawings, by using templates on how to draw a wolf, elephant, or any other animal. Using these templates helped us creating the shapes of the animals, as well as help us add all the detail that was needed. These templates helped me improve my drawing skills by giving me something to look at while I draw, and helped me create a drawing to the right scale. Another resource I used was the charcoal pencils, which helped make my drawing darker, as well as helped make certain areas, such as the eye on the elephant, pop out more. After we created our drawings, we scanned them and then uploaded them to Adobe Illustrator on our computers. We used the image trace tool in Adobe Illustrator, to change our drawings by putting different effects on them. If you look above, you can see five different effects from the image trace tool, that changed my drawing in different ways. Using the image trace tool impacted my drawing my changing the detail or darkness of my elephant. I think learning this tool will help me in the future, if I want to make one of my drawings darker, or put another effect on it. Overall I thought this project was fun. In this project, I learned that I enjoy drawing, and I ended up finding a new passion. This was a beneficial project, and I enjoyed almost every minute of it.
Teacher Creature Project:
|
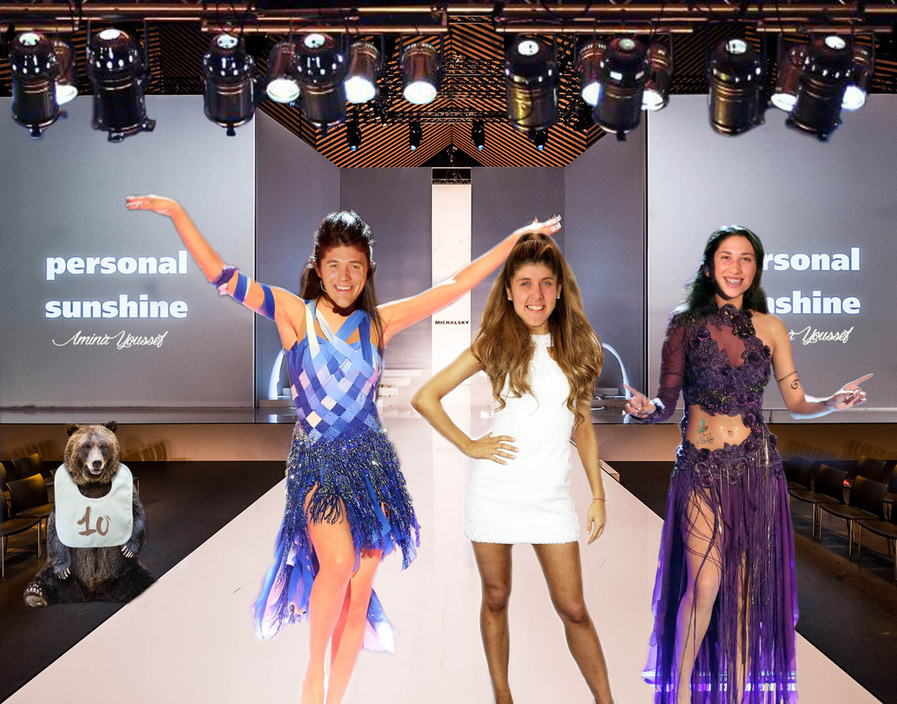
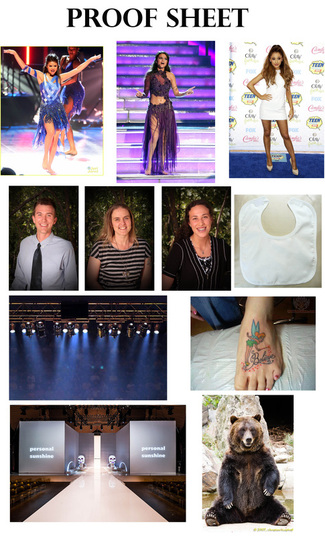
Project Reflection: For the Teacher Creature Project, we all took a teachers face, or multiple teachers faces, and put them on another body or creature to create our own original image in photoshop. For this project, we had to incorporate at least eight different images. We had to refine the edge or each different photo, and create a unique image with a background, a creature with a teacher’s face, and multiple layers with one photo on each layer. The hardest part of this project was making the teacher’s faces fit the other bodies, and making them look like that were actually meant to be there. For this you had to crop the teacher's faces from their original photos, and then paste them onto your project. Then you had to refine the edge, adjust the size, erase the edges of the face that you didn’t need, and adjust the hue/saturation, contrast, and brightness, to make the face look like it was meant for the body you were photoshopping it onto. This took a lot of time, and at the beginning of the project I really struggled with the angle of the faces, because it was a lot harder to put Stephen’s face on a smaller head. I also struggled with what I wanted to do, because I started my project over about four times before I was satisfied with my background and design. My favorite part of this project was being able to create my own image and show my artistic side of myself through photoshop. I loved having room to prove my skills in photoshop, while at the same time having a lot of space to create a unique project. During this project, I learned that I really enjoy assignments where I am able to have a lot of space and room to learn and create things on my own. I also learned that I loved digital art and photoshop, however I need a lot of time to complete a project. I don’t like being rushed, and I definitely learned that in the past few weeks. However, overall I thought this was a really fun project, and I am happy with my final product.
|
Photoshop Tutorials:
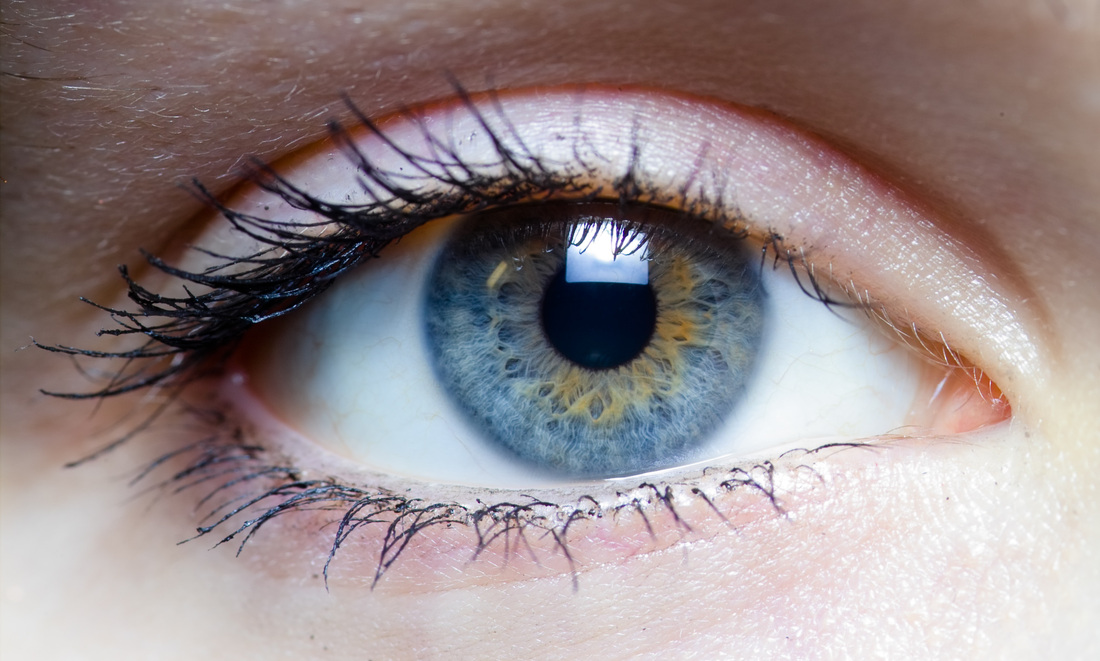
Original Eye
|
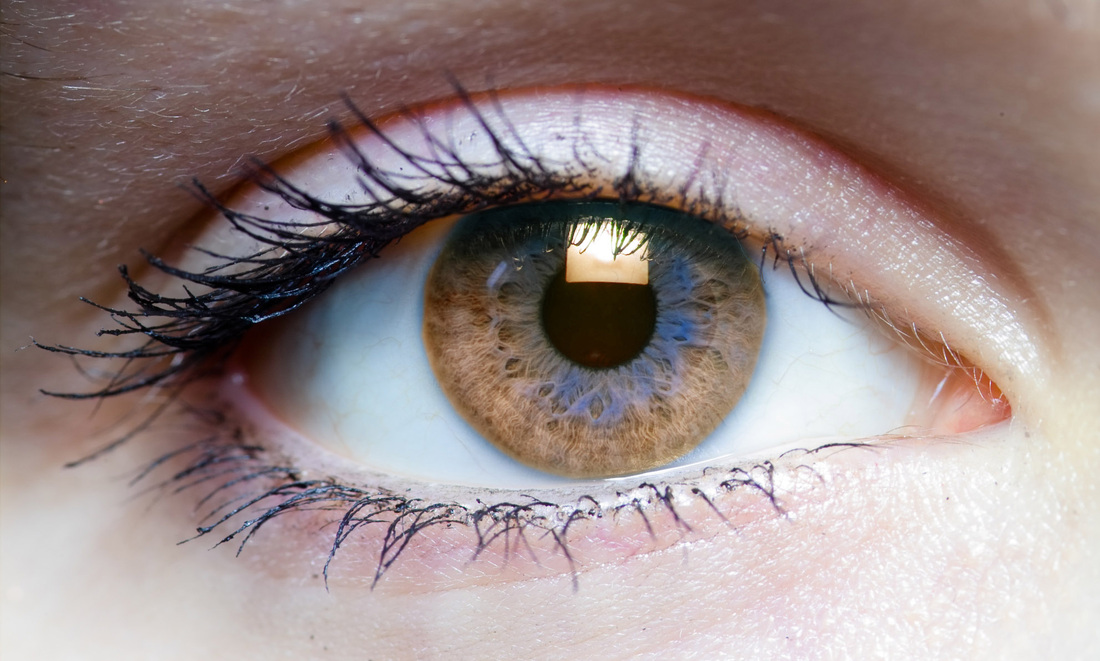
Photoshopped Eye
|
What I did:
- Used the pen tool to select the eye
- Used Hue and Saturation to change the color
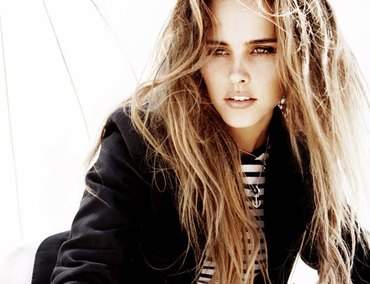
Original Face
|
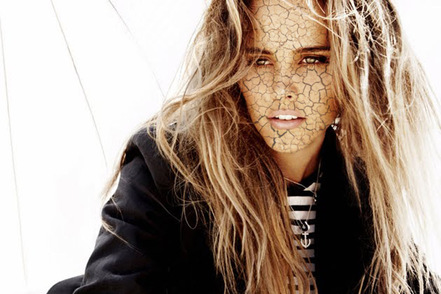
Photoshopped Face
|
What I did:
- Took a photo from the cracked ground
- Used a photo of a girl
- Used the Blending Mode to switch the layer of the cracked ground from "Normal" to "Multiply"
- Used the eraser tool to erase around her face, inside her eyes, on her lips, and on her nose
- Used the burn tool to bring out the cracks
- Used the Vibrance, Hue/Saturation, and the Color Balance tools to make the face the same color as the body
- Used the Gaussian Blur tool too make the cracks fit better to the face
- Combined the layers
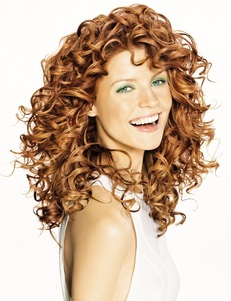
Original Hair
|
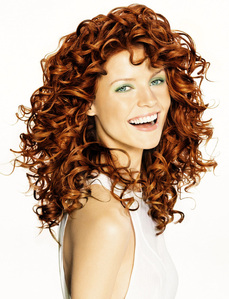
Photoshopped Hair
|
What I did:
- Made a layer above the original photo and changed the blending mode to "Soft Light"
- Used the brush tool and selected a darker color
- Put the hardness of the brush at 0% and then colored over the hair
- Used eraser tool around the hair to erase all the extra color
- Clicked on the "Adjustment Layer" option and used the Hue/Saturation tool
- Created a clipping mask and adjusted the hue/saturation to the color I wanted

Original Teeth
|
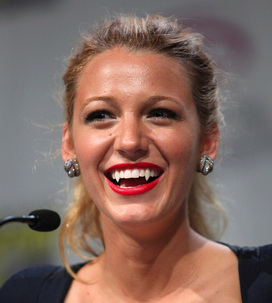
Photoshopped Teeth
|
What I did:
- Used the pen tool to select one of the teeth
- Modified the Feather Radius to 1
- Clicked "Layer Via Copy"
- Then went to "Transform" then "Warp"
- Warped the tooth to the shape I wanted
- Used Eraser tool to erase sides of tooth to make it sharper
- Repeated the same thing on the other side of the mouth
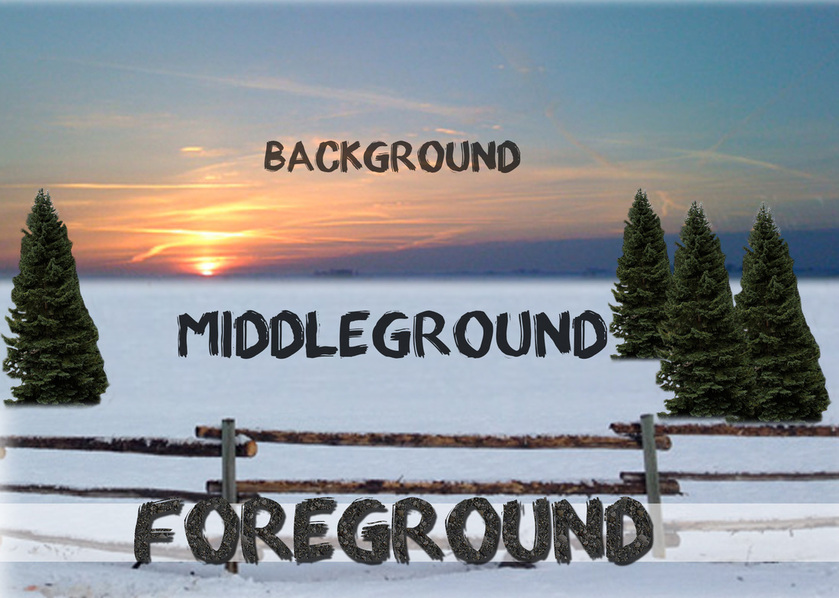
Mini Landscape Project:
|
Reflection:
During this mini project, I learned about scale and proportion, the definitions of foreground, middle ground, and background, and I learned about some new tools that I have never used before in photoshop. With scale and proportion, I learned that as you look at objects in the distance, they appear smaller than the objects that are close to you. So in photoshop, you have to take objects and shrink them down with the "Free Transform" to make it look like they fit in the distance. I also learned that objects in the distance are blurry, and less detailed than the objects that are close. In an image, foreground are the objects that appear in the front. They are very detailed, and they have a lot of texture, color, and contrast. They are viewed as large, because they are so close up in the image. Middle-ground are the objects that are in the middle of the image. They aren't as large, and color becomes less vibrant. The details start to become blurred and objects are seen as mid-size. In the Background, objects are seen as small and individual subjects become one. Colors start to blend and all objects seem blurry. There is very little to no contrast. Creating an image like this in photoshop was at first a challenge, because I didn't have all of the tools I needed to know in order for my image to look somewhat believable. After working with Roxy, I learned the Polygonal Lasso Tool which helped me unselect parts of the image I didn't want. Overall I think this was a successful mini project and I feel as if I learned a lot. |
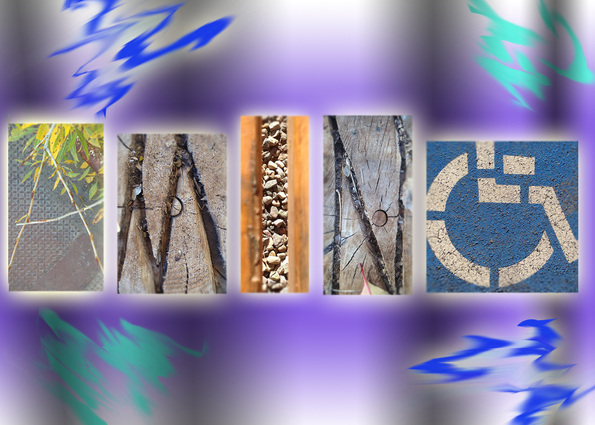
Name Project:
|
For this project we walked around outside and took photos of natural occurring letters. After taking those photos we uploaded them onto our computers and created our name in photoshop. One tool that I used in photoshop was the crop tool to adjust the size of my images.
|
HELPFUL RESOURCES:
Free Photoshop Brushes (brusheezy.com)
Free Fonts (dafont.com)
55 Ways to Use Text
100 Ways to Use Text
Youtube Tutorials
Digital Art Online
Free Photoshop Brushes (brusheezy.com)
Free Fonts (dafont.com)
55 Ways to Use Text
100 Ways to Use Text
Youtube Tutorials
Digital Art Online
- Photoshop CC Basics: http://jetsetcom.net/useful-resources/photoshop-cc-resources.html
- SHOW and TELL Photoshop Basics: http://simplephotoshop.com/photoshop_tools/index.htm
